Editors’ Favorites: Quick Picks

Quick Picks

Tanya and I love when new products get released and our friends at Webster’s Pages just announced their new Quick Picks, which is a brand new line of assorted products at amazing prices! Grouped into four price categories ($1, $5, $12, $20), each box is packed with an assortment of some of Webster’s Pages gorgeous embellishments. It’s a great way for card makers to add some of their favorites to their collection without spending a lot of money. These Quick Picks are so much fun and we can’t wait to grab some for ourselves!

Leave a comment


Card-Making Supplies Up to 40% Off!

Fall Clearance Sale

Now is the time to stock up on crafting supplies with the Annie’s Fall Clearance Sale! Products are marked up to 40% off and there are 700+ products included in the sale. With categories ranging from paper crafting and sewing to knitting and plastic canvas, you’ll find a wide range of products. Plus, there are also some of our favorite paper-craft books discounted—these would make great Christmas gifts! Hurry over today because quantities are limited and products are selling out quickly. Click here to get shopping!

Leave a comment


Alice’s Outside the Box

Sitting down with a cup of tea and flipping through the pages of a magazine is one of my guilty pleasures, so I loved getting this assignment from CardMaker to find a project from an older issue to re-create. It’s interesting to see how some products and trends change from year to year and how others seem to stand the test of time.

Paper piecing is one of those techniques that has been around for a long time and is fun to do, so I was immediately drawn to Cindy Baird’s Patchwork Pumpkin card from page 32 of the September 2010 issue of CardMaker.

Patchwork Pumpkin

I thought it would be nice to create a card for the holidays, so I designed a Christmas stocking pattern to use as the basis for my card. If you would like to make this card, you can download the pattern for free at my blog by clicking HERE.

Stocking Card

First, I cut a whole stocking out of red cardstock to use as the base. Then I cut apart the individual sections and used those as templates to cut the various pieces. This is a great technique to use up scraps.

Cindy used two different embossing folders on her card and I did likewise. The white felt on the cuff, as well as the green cardstock on the heel, is embossed with a candy cane stripe pattern; the red cardstock under the cuff, as well as the kraft cardstock background, is embossed with a chevron design.

Stocking

I loved the faux stitching that Cindy did on her card by piercing holes around the edges of each section and I did the same thing to my card. Instead of a separate sentiment and die-cut element, I chose to add a tag to the top of the stocking.

There is so much inspiration to be found in the CardMaker archives. Did you know that a subscription to the magazine includes digital access to two years worth of back issues? It’s a great place to jumpstart your creativity. You can subscribe by clicking here.

Thanks so much for visiting the CardMaker blog today!

-Alice

Supplies used: Kraft and pure poppy cardstock from Papertrey Ink; intense kiwi cardstock from Bazzill Basics Paper; red polka dot mambiCARDS™ (#CPX-16), Christmas Chalkboard Soft Spoken stickers (#SSL-16), red self-adhesive rhinestones (#RW-197) and Christmas themed mambiSHEETS™ 12 x 12 paper pad (#PADX-268) from me & my BIG ideas; ‘Tis The Season Collage and Christmas Ornaments patterned papers from Karen Foster Design; Stripe embossing folder from Darice; Chevrons Embossalicious embossing folder from Crafter’s Companion; Mini Tape Runner and 3D Foam Adhesive Squares from Therm O Web.

6 Comments


Becky’s Technique of the Week: Second-Generation Stamping

I love stamping, and I am fascinated by all of the fun ways you can use stamps to create many different looks. One of the first stamping techniques I learned was second-generation stamping. I was “wowed” that you could create such an interesting effect by simply stamping a second time without re-inking your stamp. I am sure many of you already know this technique, but if you are a more advanced stamper you may have forgotten about such a simple little way to add dimension to a card. I admit I haven’t used this technique for quite some time, but I wanted to create a snowflake card and I knew this would be the perfect technique to add some depth to the background!

Step 1

Start by inking up your stamp and then stamping the image onto your paper.

Step 2

Then, without re-inking your stamp, stamp the image again and it will create a lighter image than the first. Yes, it is that simple!

Card

If you are new to stamping, or have been stamping for awhile but simply forgot about this technique, I encourage you to get your stamps out and give it a try!

-Becky

Supplies used: Blushing bride, pink pirouette, crumb cake and whisper white cardstock; Festive Flurry and Endless Wishes stamp sets; blushing bride, crumb cake, and VersaMark ink pads; iridescent ice and white embossing powder; crumb cake seam binding and linen thread; Vintage Faceted button; Festive Flurry Framelit dies; Perfect Polka dots embossing folder; heat tool; Big Shot machine from Stampin’ Up!

2 Comments


Creative Paper Quilling Blog Hop

Creative Paper Quilling book

We’re celebrating the release of Creative Paper Quilling with a blog hop! In this new book, you’ll find 28 quilling projects ranging from cards, jewelry, wall art and more. Whether you’re a beginner or you have been quilling for years, you’re sure to find projects that you’ll love. Step-by-step instructions are included for each project along with a Quilling Basics section and Shape Gallery. Click here to order a copy!

Join designer Ann Martin along with a few of the other contributing artists as they share their beautiful projects from the book. First up is the talented Sandy Diaz who created the stunning Bloom framed piece shown on the cover.

Here is the complete hop list if you get lost along the way:

CardMaker (*you are here)

Sandy Diaz

Linda Krieg

Denise Cameron

Charlotte Canup

Sue Custer

Ann Martin

8 Comments


Card Challenge Corner: Our Heroes

Operation Write Home

In this week’s Card Challenge Corner, we’re featuring Operation Write Home, an organization that sends blank handmade greeting cards to our nation’s armed forces that they can use to write home on, along with “AnyHero” cards of encouragement. Their AnyHero Christmas deadline is coming up quickly on November 30, 2013. We’re challenging you this week to create a few cards and write notes of gratitude inside to say thank you to the soldiers for their service. Please do not use glitter. For complete guidelines on creating handmade cards, click here.

Leave a comment


Latisha’s Scrap Treasures

It always amazes me what you can make so quickly out of scraps. Some of my favorite cards are the ones with a simple design, minimal product and a great sentiment. I had some 6 x 6-inch patterned paper and ribbon sitting on my craft table and they were the perfect colors to make a fall-theme or Thanksgiving card.

Photo 1

I had a card base already made. So I cut a few strips of patterned paper that I had lying on my desk and adhered them to the card front. Before I added the ribbon, I stamped a sentiment with black ink. To embellish, I rounded the bottom corner with a corner-rounder punch and added a few stickers.

Photo 2

So quick and easy, and best of all, it was created using scraps that I had from an older project!

-Latisha

Supplies used: School Memories 6 x 6 paper pad and Sugardot stickers from Prima Marketing Inc.; Happy Everything stamp set from Lawn Fawn; Memento tuxedo black ink pad from Imagine Crafts/Tsukineko; ribbon from May Arts Ribbon; E-Z Runner from Scrapbook Adhesives by 3L®.

2 Comments


Monoprinting with Sara Naumann & Gelli Arts

Print A

CardMaker readers love learning new techniques and in our current issue, designer Sara Naumann introduces us to the world of monoprinting.

Print B

Monoprinting is a technique that allows you to create one-of-a-kind prints that make gorgeous backgrounds for your cards. While this technique may look difficult, it’s actually quite simple. Sara writes, “Simply brayer paint onto a printing plate, make marks to create texture, then press a piece of paper on top. Lift to reveal your monoprinted design!”

Brayer Ink

Adding Texture

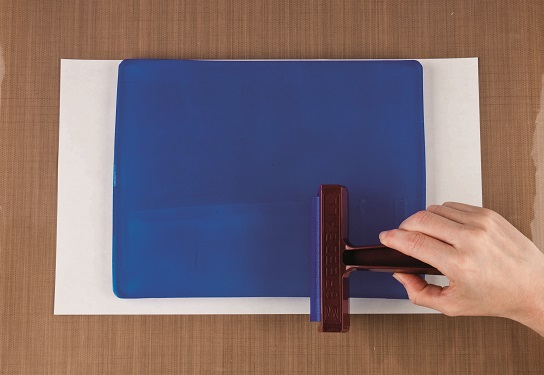
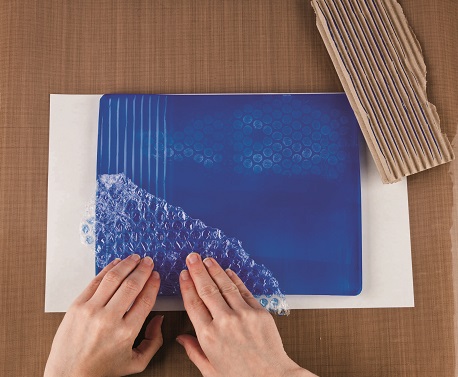
The Gel Printing Plate from Gelli Arts makes the monoprinting process easier than ever! This unique printing plate looks and feels like gelatin. It is reusable and is quick and easy to clean up. Gelli Arts offers various sizes of printing plates including an 8-inch-round plate along with classroom kits for anyone needing multiple plates. Sara used the gel printing plate to create all of her monoprints for the Winter issue.

We didn’t have room to include all of Sara’s monoprint projects in the issue, so we’re giving you a free project today!
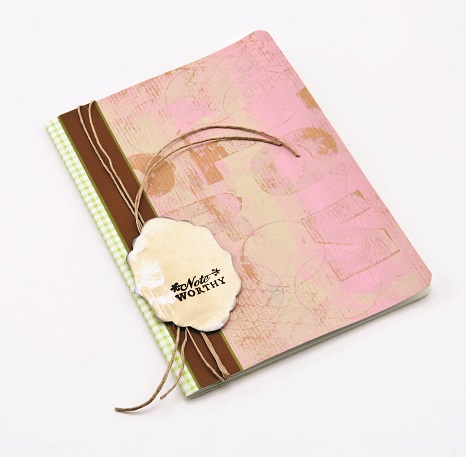
Notebook

Noteworthy Notebook

Design by Sara Naumann
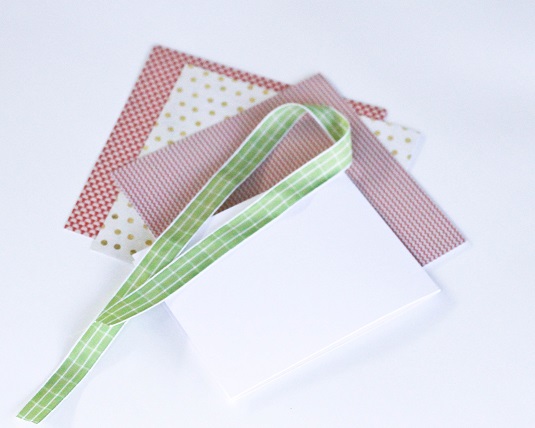
Materials

Gel Plate Instructions

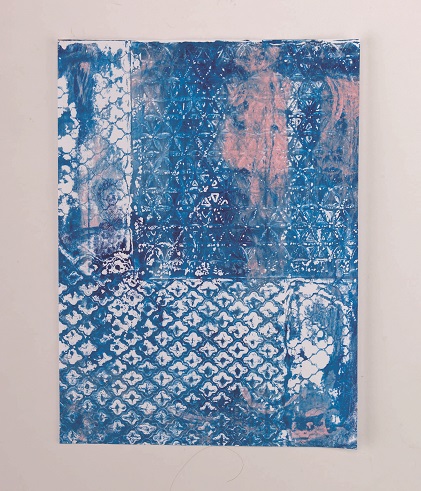
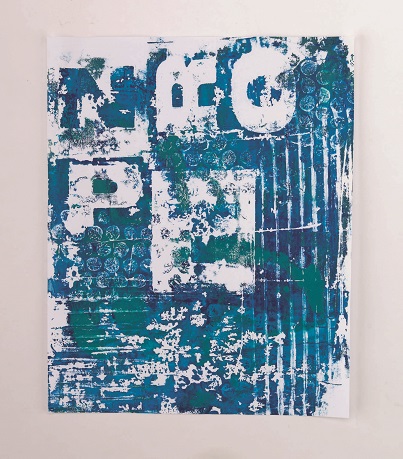
1. Apply pink paint to Gel Plate; add a small amount of tan. Brayer paint onto gel plate.

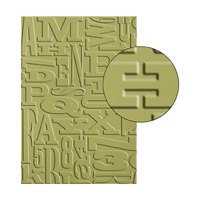
2. Press several chipboard letters into wet paint; lift off.

3. Press Quatrefoil stencil into wet paint; lift off. Press end of  toilet paper roll randomly into paint making circles.

4. Press kraft paper into paint; lift paper.

Assembly Instructions

1. Cut a 7 x 8 1/4-inch piece from green check patterned paper. Keeping journal closed, adhere paper to back of journal, wrapping around spine to cover about 1 inch of front cover.

2. Glue painted paper to front cover, slightly overlapping previous piece; trim excess.

3. Cut a 1 x 8 1/4-inch strip of brown cardstock. Adhere to green cardstock; trim a small border. Adhere to cover as shown.

4. Wrap cover with twine twice, securing with clear tape.

5. Using Exquisite Label template, trace and cut a label from white cardstock. Apply tan paint onto label with fingertips; let dry. Stamp sentiment using watermark ink. Sprinkle with embossing powder; heat-emboss. Ink edges black; attach label to cover using foam tape.

Designer’s Tip: Remember the letters will read backwards on your printed paper—turn them over before placing them in the paint!

For more information on monoprinting using the Gel Printing Plate along with instructions for two projects, check out pages 40-43 in the Winter issue of CardMaker. Pick up a copy at your local newsstand or purchase a digital copy by clicking here!

Leave a comment


Halloween Greetings

Batty card

Happy Halloween from all of us at CardMaker!

Full instructions for the card shown above, designed by Carolyn King, can be found on page 72 in the Autumn 2013 issue of CardMaker. Purchase a digital copy here.

2 Comments


Card Challenge Corner: Life’s Rough

Embossing

Turn the phrase “Life’s Rough” into a positive thing in this week’s Card Challenge Corner. Use a detailed embossing folder and make the background of your card rough with texture to create depth and dimension to your design. There are so many unique embossing folders available-we can’t wait to see which ones you use this week! When you’ve finished making your card, post a photo of it on CardMaker’s Facebook page.

Alphabet Press Textured Impressions Embossing Folder shown above from Stampin’ Up!

Leave a comment