New Features
Design Hints

Paint Pros
Reflect a room's era and favored atmosphere by selecting historic paint colors with care.
Downloads & Projects
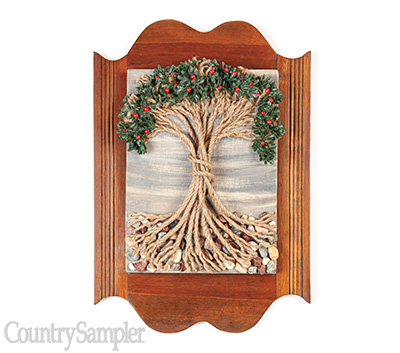
Rope Tree Wall Hanging
Craft a rustic representation of an apple tree out of cord, faux greenery, small beads and rocks.
Reader Photo Gallery
Share your own home, and view other readers' photos!

Contests

40th Anniversary Giveaway!
We are celebrating our anniversary in a BIG way. Enter our Summer giveaway and you could win one of 40 free subscriptions to Country Sampler. Enter today for your chance to win!

Roll Back the Years
Draw the eye upward to a special vignette. A mint-green enamel stove with a high back is the ideal perch for jadeite and ironstone in Lisa and Mark Lucas' kitchen. An old-fashioned sign slipped behind a weathered window frame emphasizes the vibe.
Photographed and Styled by Gridley + Graves
Poll
What is your favorite way to bring bright pops of color into your spaces for summer?